[toc]
How can I install the theme?
- Upload the one-page-profile folder to the /wp-content/themes/ directory.
- Activate the One Page Profile theme through the „Appearance“ menu in WordPress.
- Configure the theme by going to the „Theme Options“ menu that appears in the„Appearance“ settings menu.
What are the shortcodes that can I use?
The only shortcode that is available in this theme is the “icon” shortcode. You can find the exact definition on the available shortcodes page
Which icons can i use in buttons, boxes, etc.?
Please go to this page: List of available icons
I’m using the Flexslider on the homepage but the slides seem to be blurry. What can I do?
As a standard, the slides get resized by the browser. To avoid that go to “Appearance” > “Theme Options” in your WordPress Admin Panel, then go to “Extended” > “CSS” and then copy&paste the following:
.container-fluid,
.container {
  .slides img {
    width: auto;
  }
}
Klick save
I’m changing my theme’s options but when I save them I’m prompted to upload the settings via FTP, but I just want to see them be applied. What am I missing?
On some webservers there is a miss-configuration on the user-rights. This means that WordPress has no rights to write files to the filesystem. It then brings up the FTP-window so that it can change the files there.
If you make any changes that affect the stylesheets (CSS files) the theme wants to write that directly to the filesystem so that it get loaded quicker on the frontend. It’s much more efficient to not generate the CSS-files “on the fly”.
How can I add new columns to the ‘Chart section’?
Just log-in to your WordPress administration panel. Go to “Appearance” -> “Theme options”. Then click the tab “Homepage” (or in some cases it’s called “Blogpage”). Scroll down to the “Chart section”, enter a new column name and hit enter on your keyboard. The line should be added automatically. You can then sort the columns by drag&drop the reorder-icon (![]() ).
).
How can I add new rows to the ‘Chart section’?
Just log-in to your WordPress administration panel. Go to “Appearance” -> “Theme options”. Then click the tab “Homepage” (or in some cases it’s called “Blogpage”). Scroll down to the “chart section”, enter a new row name and hit enter on your keyboard. The line should be added automatically. You can then sort the rows by drag&drop the reorder-icon (![]() ).
).
Enter a name and a percentage separated by two colons like this:
- Label (will be displayed as the name)
- :: (the separator of the label and the value)
- Value (the actual length of the bar in percent)
Example:
Coding::80
The value (in the example above it’s ’80’) describes how long the bar will be. In the example above the bar will be 80% long.
- You can make bars longer than 100% to highlight one of your qualifications. But on smaller displays this can cause bad-looking effects. Do not make the bars longer than 110% is a good choice.
- You can make bars smaller than 0% (maybe -10%) but this can overlay the actual text (it depends on the label name length).
How can I add new bubbles to the ‘Career section’?
Just log-in to your WordPress administration panel. Go to “Appearance” -> “Theme options”. Then click the tab “Homepage” (or in some cases it’s called “Blogpage”). Scroll down to the “career section”, enter a new name and hit enter on your keyboard. The line should be added automatically. You can then sort the rows by drag&drop the reorder-icon (![]() ).
).
Enter a bubble name, a description and a offset from top.
- Label
- :: (separator)
- Description
- :: (separator)
- Offset from top
1997::got my first PC::20
The above displays the following:
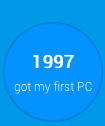
Note the following:
- The label will always be bolded
- There really not a lot of space to add a description. So keep it short!
- The last value is the offset from top. If you want to create a typical ‘ladder of your career’ you should start with higher numbers and end up with lower numbers.
- The colors of the bubbles are generated randomly.
- The last bubble will always be green (because this should be the thing you do the most at the moment)
How can I add new items to the ‘Portfolio section’?
Just log-in to your WordPress administration panel. Go to “Appearance” -> “Theme options”. Then click the tab “Homepage” (or in some cases it’s called “Blogpage”). Scroll down to the “portfolio section”, click into the the input-field and add a new image. After that the line should be added automatically. You can then sort the columns by drag&drop the reorder-icon (![]() ).
).
Click into the text-field to include an image. This image should have the following size: 130 x 130 pixels.
- ID of the Attachment
- :: (separator)
- Label (the actual name)
- :: (separator)
- Link (maybe to a page or a post)
Check out this example:
415::Mojo::http://my-website.com/portfolio/mojo/
This will do the following:
- Add the attachment (image) with the ID of 415
- Use the string “Mojo” as the title
- Use http://my-website.com/portfolio/mojo/ as the link when clicked on the item
How can I remove bubbles, rows, columns or items?
Just remove the text and focus out of the input field. When it’s empty it gets removed automatically.