This is the inline help for the Schema Corporate WordPress theme with schema.org support. Please use the inline-help buttons to browse through this document.
Layout-Settings (General)
Full width layout
Whether to display the homepage in a full width fluid layout. “Fluid” means that the theme adjusts itself whenever the browser windows resizes. Here is an example:

Logo
Choose a logo to use on your webpage. If no picture is chosen, the title and subtitle will show up.
Logo Width (in Pixels)
The width of the normal (non-retina) logo image. This field normally gets filled automatically when you insert a logo image.
Logo Height (in Pixels)
The height of the normal (non-retina) logo image. This field normally gets filled automatically when you insert a logo image.
Logo for Retina displays
Choose a logo to use for retina displays. The picture should have twice the resolution of the standard-logo. The image will be included with twice the resolution of the logo width and logo height.
Favicon
Choose the favicon to show up in the browser. Note: Not every browser shows favicons.
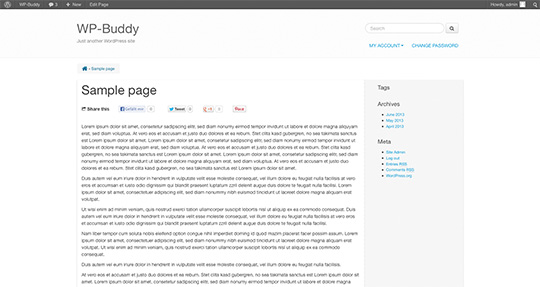
Standard Header Image
Choose a standard-header image to use on your webpage. This can be changed within every single post, page or custom post type. Here is an example how it looks like:
Header image exampleHeader-Image position
The position of the header image. Read more about this here: CSS background-position Property.
Phone number
Enter a phone number. Leave this field blank if nothing should be displayed. The phone number is displayed in the headerbar. You should activate the headerbar to show it.
Phone availability
Enter a time in which you are reachable by phone. The phone availability is displayed in the headerbar. You should activate the headerbar to show it.
Display Title
Whether to display the blogs title. Even when a logo was selected.
Display Subtitle
Whether to display the blogs subtitle
Display Headerbar
Whether to display the headerbar. You can find the headerbar on top of your webpage. The headerbar displays:
- the social icons (if activated)
- the phone number (if any)
- the phone availability (if any)
Display search field
Whether to display the search field in the header.
Affix the menu to the top
Affix the menu to the top when the user scrolls the page. This means that the menu will fix itself to the top position when scrolling position is on a certain place.
Example: The menu was fixed to the top after scrolling down
Place menu after header
Places the menu after the header. Here is how it looks like:


“Go to top button”
Display the “Go to top” button if the user scrolls down. This button appears on a specific scrolling-position.
![]()
Layout-Settings (Single Post)
Display Author
Whether to display the author’s name on single post sites.
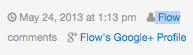
Display Date
Whether to display the date on single post sites.
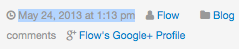
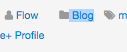
Display Categories
Whether to display the categories of a post on single post sites.
Display Tags
Whether to display the tags of a post on single post sites.

Display number of comments
Whether to display the number of comments of a post on single post sites.

Display Rating
Whether to display the Star Rating on single post sites.
Display Google+ Author Information
Whether to display the Google+ link (if activated) on single post sites. Authorship functionality should be turned on (under “SEO” / “Google+ Authorship”).
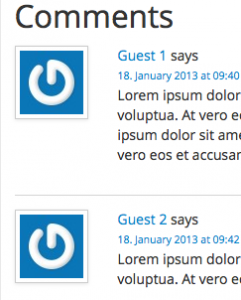
Display comments
Whether to display the comments section after the content of a post on single post sites.
Display Thumbnails
Whether to display thumbnails on single post sites. The thumbnails only show up if a post has a thumbnail. If not, a placeholder-image will be shown.
Display Right Sidebar
Whether to display the right sidebar on singe posts. This can be turned on/off on each page separately.
Display Left Sidebar
Whether to display the left sidebar on single posts. This can be turned on/off on each page separately.
Layout-Settings (Single Page)
Display Author
Whether to display the author’s name on single page sites.
Display Date
Whether to display the date on single page sites.
Display Categories
Whether to display the categories of a page.
Display number of comments
Whether to display the number of comments.
Display Rating
Whether to display the Star Rating on a single page.
Display Google+ Author Information
Whether to display the Google+ link (if activated) on a single page. Authorship functionality should be turned on (under “SEO” / “Google+ Authorship”).
Display comments
Whether to display the comments section.
Display Thumbnails
Whether to display thumbnails on a single page. The thumbnails only show up if a post has a thumbnail. If not, a placeholder-image will be shown.
Display Right Sidebar
Whether to display the right sidebar on singe pages. This can be turned on/off on each page separately.
Display Left Sidebar
Whether to display the left sidebar on single pages. This can be turned on/off on each page separately.
Layout-Settings (Search/Category/Tag/Archive Pages)
Display Author
Whether to display the author’s name on search / category / tag and archive pages.
Display Date
Whether to display the date on search / category / tag and archive pages.
Display Categories
Whether to display the categories on search / category / tag and archive pages.
Display Tags
Whether to display the tags on search / category / tag and archive pages.
Display number of comments
Whether to display the number of comments on search / category / tag and archive pages.
Display Rating
Whether to display the Star Rating on search / category / tag and archive pages.
Display Thumbnails
Whether to display thumbnails on search / category / tag and archive pages. The thumbnails only show up if a post has a thumbnail. If not, a placeholder-image will be shown.
Display Content
Whether to display the content on search / category / tag and archive pages.
Display Right Sidebar
Whether to display the right sidebar on search / category / tag and archive pages.
Display Left Sidebar
Whether to display the left sidebar on search / category / tag and archive pages.
Homepage / Blog Page (General)
Home- or Blogpage Layout
As per default WordPress shows the homepage as the frontpage. This will call the themes frontpage.php which means that you see a customized site.
But on the “Settings” -> “Reading” options page you can also define a single page as the homepage. This will call the frontpage.php on the site you’ve defined as the “posts page”.
Here you can choose between several layout styles (with or without sidebars):
- Standard
- A full width page. Slider on top (if activated)
- Left Sidebar
- Left sidebar. Slider right.
- Left Sidebar with Slider
- Left sidebar. Sidebar on top (if activated).
- Right sidebar
- Right sidebar. Slider left.
Please take a look at our live preview to see examples.
Display “About us”
Whether to display the “About us” section on the homepage. Please note that this is a widget-area. This means that you have to add widgets to the “About us” section. To do this, please go to “Appearance” -> “Widgets” and than drag & drop some widgets to the “About us” sidebar.
[box type=”info”]Note: It looks best when you just add two widgets. Maybe a text-widget and a Twitter-Widget (or a Newsletter-Widget)[/box]
Display the About-Us sectionHomepage / Blog Page (Slider)
Display Featured Slider
Whether the featured slider should be displayed.
Use Revolution Slider
Whether to use one of your revolution sliders instead of the normal one.
Revolution Slider
Choose one of your revolution sliders. If you don’t have any revolutions sliders, then just add one. If there is no “Revolution Slider” menu then go to “Extended” -> “Plugins” and activate the Revolution Slider plugin.
Display Slider Title
Whether the featured slider title should be displayed. This only applies to non-revolutions sliders.
Post type to display
Select what post type to display on the featured slider. If you have selected “Let me choose” on the “What to use exactly” option, than this option will be ignored.
[box type=”info”]Good to know: To force sorting on menu-order, please do the following:
- Select “Pages” on the “Post type to display”-Option
- Select “Let me choose” on the “What to use exactly”-Option
- Select the pages you want to use on the “Select pots” option.
[/box]
What to use exactly
What to use for the featured slider. This depends on what you’ve selected on the “post type to display” setting. Chose one of the following:
- Latest
- Displays the latest posts, pages or custom post type. This depends on what you’ve selected on the “post type to display” option.
- Category
- Select this option and another option will appear. There you can select the categories you want to use. This depends on what you’ve selected on the “post type to display” option.
- Tag
- Select this option and another option will appear. There you can select the tags you want to use. This depends on what you’ve selected on the “post type to display” option.
- Let me choose
- Select this option and another option will appear. There you can select single posts, pages or custom post types you want to use. This depends on what you’ve selected on the “post type to display” option.
- Nothing
[box type=”info”]Good to know: Select “nothing” to hide this area.[/box]
Category
Please choose one or more categories.
Tags
Please choose one or more tags. Start typing to choose.
Select posts
Choose one or more posts. Start typing to select.
Featured Slider Animation
Choose an effect for sliding. Standard is slide.
Featured Slider Animation Speed in ms
Choose the speed between slides. The value is specified in milliseconds.
Featured Slider Timeout
Milliseconds between slide transitions.
Number of slides to display
Choose the maximum number of slides to show.
[box type=”info”]Please note: If a post, a page or any other custom post type does not have a thumbnail it will not show up in the slider.[/box]
Animate slider automatically
Whether the featured slider should be animate automatically to the next slide.
Home- or Blogpage (Quote)
Display Quote
Whether to display the quote on the homepage or blogpage.
Quote Text
The actual quote text.
Where to show the quote
Where to show the quote.
- Before slider
- After slider
- After the “About us” section
- If the “About us” section (widget area) does not have any widgets, the quote will be displayed after the slider.
Home- or Blogpage (Highlighted Posts/Pages)
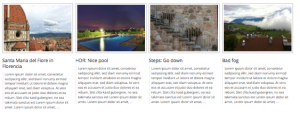
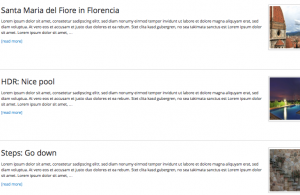
Alignment
You can align the individual contents horizontally or vertically.
This is horizontally:
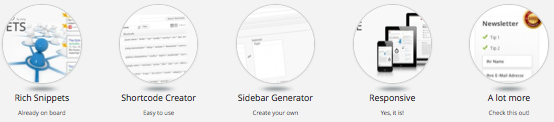
This is vertically:
Post type to display
What post type to display on the highlighted posts section.
[box type=”info”]Good to know: To force sorting on menu-order, please do the following:
- Select “Pages” on the “Post type to display”-Option
- Select “Let me choose” on the “What to use exactly”-Option
- Select the pages you want to use on the “Select pots” option.
[/box]
What to use exactly
What to use for the highlighted posts section
[box type=”info”]Good to know: Select “nothing” to hide this area.[/box]
Category
Please choose one or more categories
Tags
Please choose one or more tags. Start typing to choose.
Select posts
Choose one or more posts. Start typing to select.
Number of posts / pages to show
Choose a number of posts, pages or other media to show on the home or blogpage. If you are using the sticky post feature this number will increase with the number of sticky posts you are currently using. Read more about the sticky post feature here.
Display Thumbnails
Whether you want to display thumbnails on the home- or blogpage
Display Content
Whether you want to display the content (If you want to display only thumbnails, you can disable the content).
Display Author
Whether to display the author’s name.
Display Date
Whether to display the date.
Display Categories
Whether to display the categories.
Display Tags
Whether to display the tags.

Display number of comments
Whether to display the number of comments.
Display Google+ Author Information
Whether to display the Google+ link (if activated). Authorship functionality should be turned on (under “SEO” / “Google+ Authorship”).
Display Rating
Whether to display the Star Rating
Home- or Blogpage (Latest posts/pages)
Alignment
You can align the individual contents horizontally or vertically.
This is horizontal:
This is vertical:
Post type to display
What post type to display on the homepage posts section.
[box type=”info”]Good to know: To force sorting on menu-order, please do the following:
- Select “Pages” on the “Post type to display”-Option
- Select “Let me choose” on the “What to use exactly”-Option
- Select the pages you want to use on the “Select pots” option.
[/box]
What to use exactly
What to use for the homepage posts section
[box type=”info”]Good to know: Select “nothing” to hide this area.[/box]
Category
Please choose one or more categories
Tags
Please choose one or more tags. Start typing to choose.
Select posts
Choose one or more posts. Start typing to select.
Number of posts / pages to show
Choose a number of posts, pages or other media to show on the home or blogpage. If you are using the sticky post feature this number will increase with the number of sticky posts you are currently using. Read more about the sticky post feature here.
Display Thumbnails
Whether you want to display thumbnails on the home- or blogpage.
Display Content
Whether you want to display the content (If you want to display only thumbnails, you can disable the text).
Display Author
Whether to display the author’s name.
Display Date
Whether to display the date.
Display Categories
Whether to display the categories.
Display Tags
Whether to display the tags.
Display number of comments
Whether to display the number of comments.
Display Google+ Author Information
Whether to display the Google+ link (if activated). Authorship functionality should be turned on (under “SEO” / “Google+ Authorship”).
Display Rating
Whether to display the Star Rating
Colorization (Colors)
Background color and image
Please use WordPress’s built-in features to changes background colors and images. Click on the link provided to do this. Please save your changes first!
Background patterns
Choose a pattern for the background. (Thanks to subtlepatterns.com).
Use my own colors
Activate this if you want to use your own color-styles.
Text color
Choose a text color.
Link color
The color for the links
Link color hover
The color for links on mouse-over.
Sidebar background color
The background color for the sidebars.
Show layout box shadows
Enable or disable box shadows of the layout.
Header background color
The background color of the header.
Content background color
The background color of the content areas.
Border colors
The standard color for borders.
Frontpage row background color
The background color of some rows on the frontpage.
Title color
The color for the headline of your website.
Subtitle color
The color for the sub-headline of your website.
Headline color
The color for all titles in the content area of your website.
Header menu link color
The color for the menu items.
Footer background pattern
Choose a pattern for the background. (Thanks to subtlepatterns.com)
Footer background color
The footer background color.
Footer 2 background pattern
Choose a pattern for the background. (Thanks to subtlepatterns.com)
Footer 2 background color
The footer background color.
LESS Variable Changer
Here you can change every single LESS variable. Click here for a list of variables: LESS variables
Custom CSS/LESS
Add your custom CSS or LESS. It will be added directly before </head> so that you can overwrite existing styles.
Colorization (Fonts)
Use other fonts
Activate this if you want to use other fonts. Please note that it is advisable to not use a lot of different font styles because this significantly effects the page load time.
Title font
Choose the font for the title. Start typing to choose one of Googles Webfonts. Note: If you need a bold font, please add this via the “Font variants” option.
Subtitle font
Choose the font for the subtitle. Start typing to choose one of Googles Webfonts. Note: If you need a bold font, please add this via the “Font variants” option.
Headline fonts
Choose the font for the headlines inside the content area. Start typing to choose one of Googles Webfonts. Note: If you need a bold font, please add this via the “Font variants” option.
Text font (sans)
Choose the font for the sans text. Start typing to choose one of Googles Webfonts. Note: If you need a bold font, please add this via the “Font variants” option.
Text font (serif)
Choose the font for the serif text. Start typing to choose one of Googles Webfonts. Note: If you need a bold font, please add this via the “Font variants” option.
Text font (mono)
Choose the font for the mono text. Start typing to choose one of Googles Webfonts. Note: If you need a bold font, please add this via the “Font variants” option.
Font variants
Please choose other font variants if you need them. For example: If you’ve chosen the “Alef”-font (which is a Google webfont) as the title font and you want the title to be bold, you should also add the Variant “Alef Bold 700”. Otherwise your bolded texts can’t be displayed bold.
Social Media (Facebook)
On top of articles
If you want to show the Facebook-Like button on top of posts.
On bottom of articles
If you want to show the Facebook-Like button after the post content.
On top of pages
If you want to show the Facebook-Like button on top of pages.
On bottom of pages
If you want to show the Facebook-Like button after the page content.
On homepage (top)
If you want to show the Facebook-Like button to appear on the frontpage (top position).
On homepage (bottom)
If you want to show the Facebook-Like button to appear on the frontpage (bottom position).
Social Media (Twitter)
On top of articles
If you want to show the Twitter-Tweet button on top of posts.
On bottom of articles
If you want to show the Twitter-Tweet button after the post content.
On top of pages
If you want to show the Twitter-Tweet button on top of pages.
On bottom of pages
If you want to show the Twitter-Tweet button after the page content.
On homepage (top)
If you want to show the Twitter-Tweet button to appear on the frontpage (top position).
On homepage (bottom)
If you want to show the Twitter-Tweet button to appear on the frontpage (bottom position).
Via @
The Twitter @via-value to be used when tweeting.
Hashtag #
The Twitter hashtag to be used when tweeting.
Social Media (Google +1)
On top of articles
If you want to show the +1 button on top of posts.
On bottom of articles
If you want to show the +1 button after the post content.
On top of pages
If you want to show the +1 button on top of pages.
On bottom of pages
If you want to show the +1 button after the page content.
On homepage (top)
If you want to show the +1 button to appear on the frontpage (top position).
On homepage (bottom)
If you want to show the +1 button to appear on the frontpage (bottom position).
Social Media (Pinterest)
On top of articles
If you want to show the Pin-It button on top of posts.
On bottom of articles
If you want to show the Pin-It button after the post content.
On top of pages
If you want to show the Pin-It button on top of pages.
On bottom of pages
If you want to show the Pin-It button after the page content.
On homepage (top)
If you want to show the Pin-it button to appear on the frontpage (top position).
On homepage (bottom)
If you want to show the Pin-it button to appear on the frontpage (bottom position).
Social Media (Social Media Buttons)
Display Social Media icons in the header bar
If the social media icons should be displayed in the headerbar.
Please not that the headerbar must be on to show the social media icons. Go to “Layout Settings” -> “Display headerbar” to turn it on.
Please note that the icons will not show up when no URLs are entered.
Display Social Media icons in the footer
If the social media icons should be displayed in the footer.
Please note that the icons will not show up when no URLs are entered.
Display RSS Icon
Whether to show the RSS-Icon beside the other social media icons.
Google+
The link to your profile on this platform.
The link to your profile on this platform.
The link to your profile on this platform.
Linked In
The link to your profile on this platform.
Github
The link to your profile on this platform.
The link to your profile on this platform.
SEO (Analytics)
Analytics Code
Add your Google Analytics code here. This should be Javascript without the <script></script> tags.
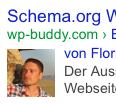
SEO (Schema.org)
Use Schema.org
Whether the Schema.org functionality should be enabled. Read this, if you want to know how Schema.org can help you spice up your search results.
Primary purpose of your website
Choose the primary purpose of the website. If you use wordpress not only for blogging but also like a content management system for your website keep this at “WebPage”.
SEO (Google+ Authorship)
Activate/Deactivate Google+ Authorship
Google gives you the opportunity to display your Google+ profile image in the search results. If you want to use this functionality please activate it. You can then read more about it in the “About Google+ Authorship” section below.
Read the following post to set up authorship correctly: How to set up Google+ authorship
Authors to use for category, archive, search and tag pages
Please choose one or more users. Read the following post to set up authorship correctly: How to set up Google+ authorship
Replace Author-Link with Google+ Link
Whether the WordPress’ standard link to author archives should be replaced with the author’s Google+ URL. Read the following post to set up authorship correctly: How to set up Google+ authorship
Open in a new window
Whether the link should be opened in a new window (only applies when the link shows up on your post, page or custom post type). Read the following post to set up authorship correctly: How to set up Google+ authorship
SEO (Google+ Publishership)
Follow this instructions to set this up correctly: How to set up Google+ Publishership.
Your Google Page URL
Whether to activate Google Publishership.
Your Google Page URL
The URL to to your Google+ page. Follow this instructions to set this up correctly: How to set up Google+ Publishership.
Google+ Page Link text
The name to show on the link. Follow this instructions to set this up correctly: How to set up Google+ Publishership.
SEO (Star Rating)
Display rating
Choose whether to show the star rating. It’s then possible that commentators rate your content.
Display rating results before the content
Whether to show the star rating results before the content (near the meta infos)
Display rating results after the content
Whether to show the star rating results after the content
SEO (Breadcrumbs)
Use Breadcrumb
Whether to display the breadcrumb navigation.
Text before Breadcrumbs
The “You are here” text (displayed before the actual breadcrumbs)
The name of “Home”
The name which will be displayed as the home link. Leave empty when it shouldn’t be displayed.
Display Home-Icon
Whether to display the home icon.
Text between Breadcrumbs
Normally this is the » between the links.
Break long titles
Specify the maximum length of the title. Leave it blank if the title should not to be cut.
Extended (Lightbox)
Activate/Deactivate PrettyPhoto
Lightbox is a simple, unobtrusive script used to overlay images on a page.
Theme
Choose a theme for PrettyPhoto
Animation Speed
Choose the animation speed (in ms) when an image will be opened
Extended (Scripts)
Custom Javascript
Add custom Javascript. You don’t need the <script></script> tags here. Custom Javascript will be added in the footer.
Extended (ReCaptcha)
Recaptcha Public Key
In order to use the captcha field on contact pages you need some secret keys which you can get here for free: http://www.google.com/recaptcha
reCaptcha Example
Recaptcha Secret Key
In order to use the captcha field on contact pages you need some secret keys which you can get here for free: http://www.google.com/recaptcha
reCaptcha ExampleExtended (Search)
Use Google Sitesearch
Turn this on to replace WordPress` built in search engine with your own Google Sitesearch. Please note that you need a Google Account for this.
Search Engine ID
Please copy and paste your search engine ID into this field. You can find it in the Google Sitesearch settings.
Ad-Channel
If ads are enabled, the value is the id of an AdSense for Search channel.
Ad-Client
If ads are enabled, the value is the AdSense publisher ID.
Extended (Affiliate)
Display “Proudly powered by”-Link
Turn this button off if you do not want to display the “Proudly powered by” link at the bottom of your webpage.
Your Affiliate-Link
You can replace the link back to our theme with your own affiliate link to earn money. Please follow this link if you want to learn more about our affiliate programs: WP-Buddy Affiliate Program
Extended (Updates)
Purchase Code
If you want to get updates automatically, please copy and past your purchase code here. Don’t know where to find your purchase code?
Extended (Plugins)
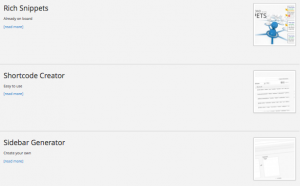
Revolution Slider
Activate or deactivate this plugin. For performance reasons you should deactivate the plugins you do not use.
Shortcode Generator
Activate or deactivate this plugin. For performance reasons you should deactivate the plugins you do not use.
Sidebar Generator
Activate or deactivate this plugin. For performance reasons you should deactivate the plugins you do not use.