For my latest plugin, the Amazon Login for WooCommerce, you need to add an Amazon app in order to use it. Here is, how this works:
Step 1. Login to “Login with Amazon” service
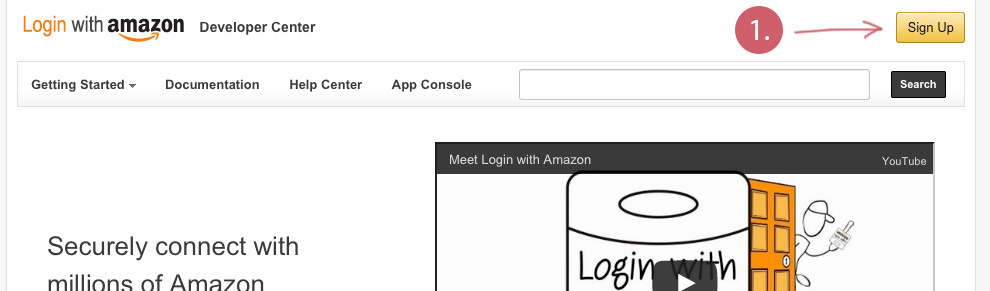
- Go to https://login.amazon.com/ and click “Sign up” on the top right corner.

Click the Signup button to register/login to the “Login with Amazon” service - Enter your Amazon username (email address) and password. If you do not have an Amazon account, you should create one first.
- After that, click on “App Console”. You should see the service agreement. You should read and confirm the agreement before going on.
If you have already some Apps running on your Amazon account you may redirected to the App Console directly. You should agree to the service terms for the Login with Amazon service - After clicking the “Get Started with Login with Amazon”-button you should be redirected to the App Console.
- If you get an error like this you need to register for an Amazon Seller Central account (see step 2). I know that this error message doesn’t really make sense. It took me some hours to find out that an Amazon Seller Central account is needed :-)

You will get this error if you do not have an Amazon Seller Central account
Step 2. (Sometimes optional): Register for an Amazon Seller Central account
If you do not have an Amazon Seller Central account, please do the following:
- Go to the Amazon Seller Central page by using one of the following URLs:
- General: https://sellercentral.amazon.com
- German: https://sellercentral.amazon.de
- There are maybe other Seller Central webpages out there in your language. Please ask Google for the domain names.
- Click on the “Register now” link that appears right below the login form.
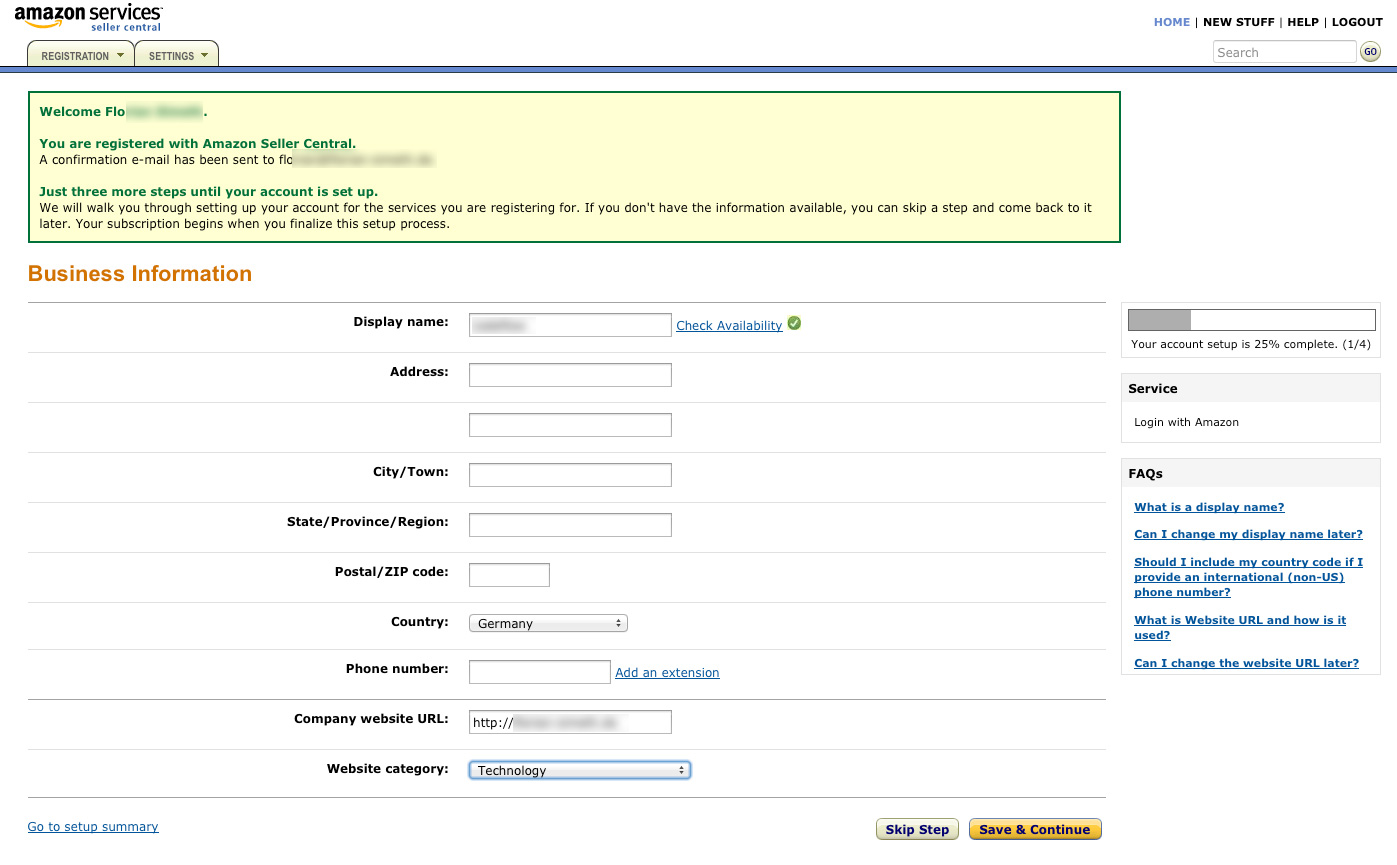
- You will be redirected to the “Sell on Amazon” page. Amazon then asks you if you’re a professional seller. You can go with the professional account which costs you about $40/month but you don’t need to. Just click the “Start selling” button where it says “Sell your stuff”. There are no monthly fees and no other fees as long as you do not sell any things on Amazon. You only want to use the “Login with Amazon” functionality. And that’s okay.
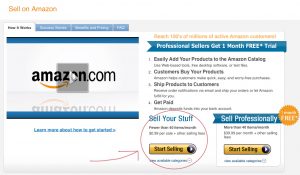
If you’re not a professional seller you can go with the ‘standard’ account - You can then login using your normal Amazon email address and password or you can create a new one.
- During registration, Amazon asks for a lot of stuff (username, address, postal code and other things). Please go on with the registration till finished.
Amazon asks for a lot of personal stuff
- Finished? Alright. Then go on with step 3.

Step 3: Setting up an Amazon App
- Go to https://login.amazon.com and log-in to the “Login with Amazon” service
- Please follow step 1 and step 2 if you do not have an Amazon account yet.
- Click on the “App Console” link in the menu which redirects you right to Amazon’s seller central.
- Then click the “Register new application”-button that you can see on the right.

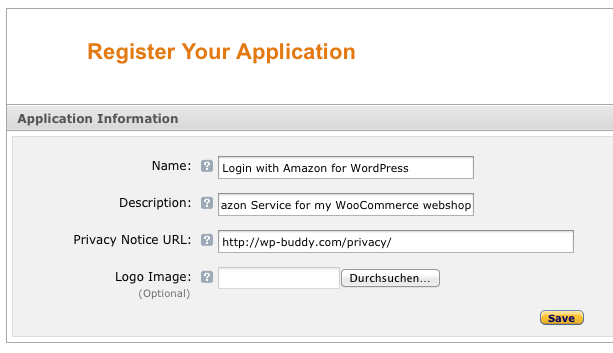
- Amazon then asks for a name, a description and a privacy URL. You can do something like this shown in the picture below:
Example application data
- Click “Save”.
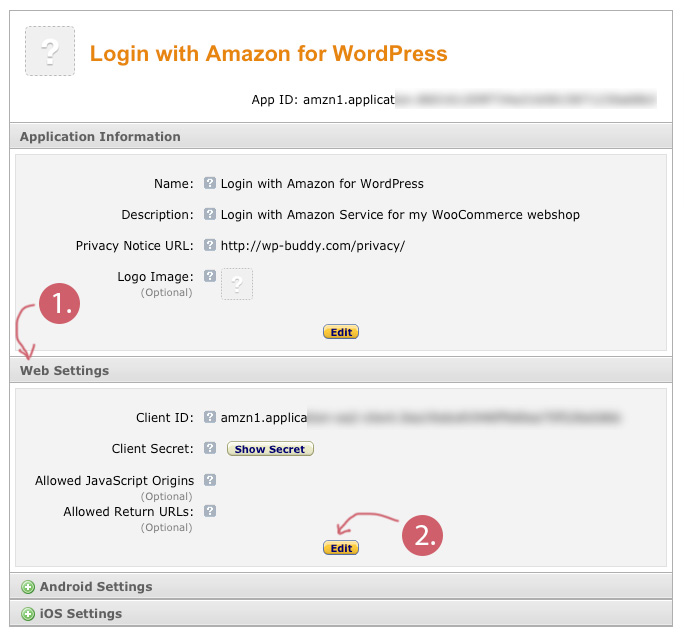
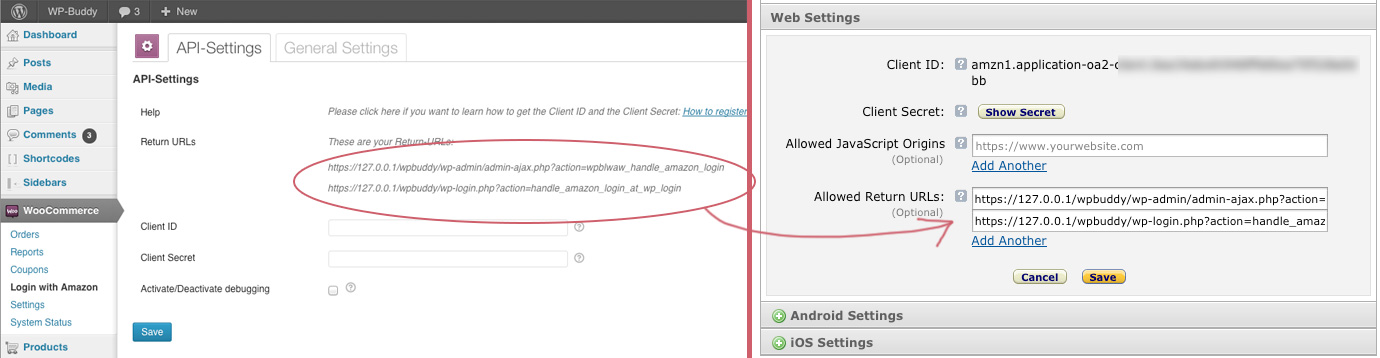
- After the page reloads click on “Web Settings” then click on “Settings”.
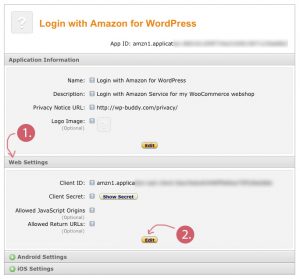
Click on the Web-Information tab and on the settings-button - Then open a new window and go to your WordPress administration panel. Go to “WooCommerce” and “Login with Amazon”. Copy and paste the URLs provided into the “Allowed return URLs”:
Copy and Paste the return URLs
- Click save.
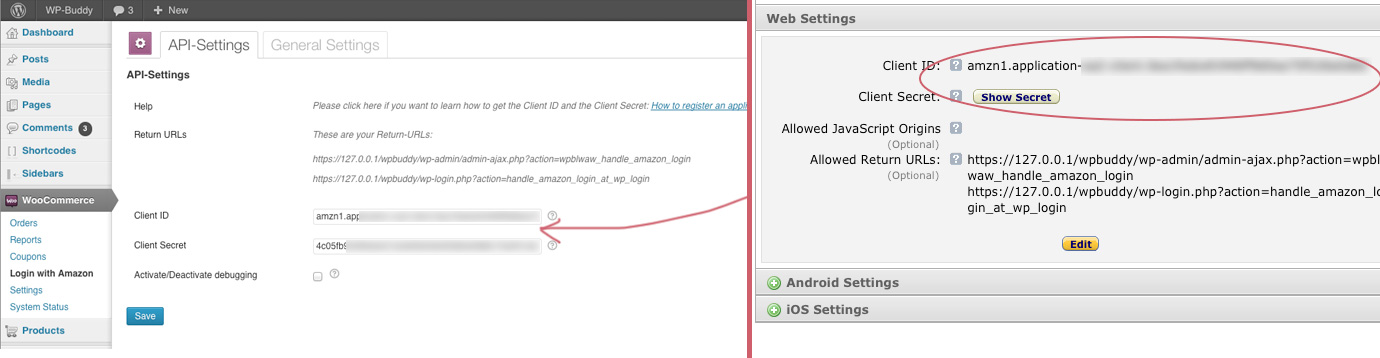
- Then copy & paste the Client ID as well as the Client Secret (the secret opens in a little window when you click the
 button).
Copy and paste the Client Secret and Client ID
button).
Copy and paste the Client Secret and Client ID
- Your done!