Here you can learn how to set the countdown up for an example product.
1. If you have not yet installed the plugin
- Please follow the instructions in the documentation that was delivered with the plugin to install it
- Then activate the plugin
- Make sure that WooCommerce is installed correctly.
- If the plugin does not work, please refer to the Product Countdown FAQ page and check the plugin requirements.
2. Configure the plugin
- Log-in to your WordPress administration panel
- Go to “WooCommerce” and click on “Countdown”:
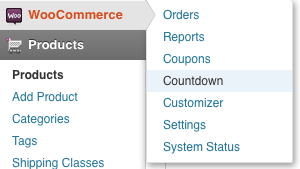
Click on “WooCommerce” and then on “Countdown” - Then activate the checkbox where it says “Show Fade-In helper”:
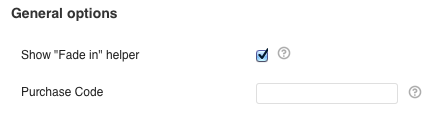
Check the checkbox for the Fade-In Helper - Optional: Fill in your purchase code to get automatic updates. Click here if you want to know where you can find your purchase code.
- Save your settings.
3. Prepare a WooCommerce product
- Log-in to your WordPress administration panel
- Go to “Products” and edit one of your WooCommerce products
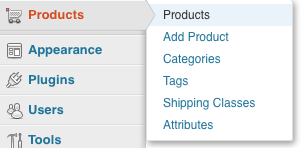
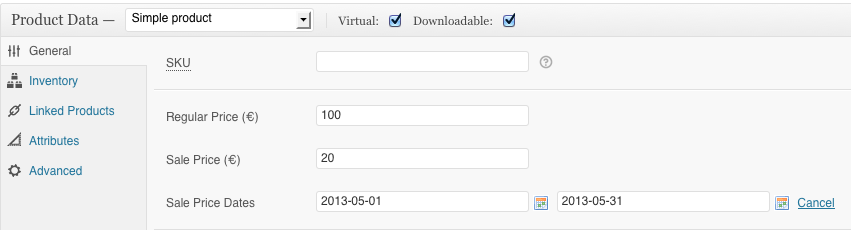
Choose “Products” from your WordPress administration panel - Scroll down to the “Product Data” screen and select “General”:
- Set a “Sales Price” and click on “Schedule” (Please note that the sales price have to different from the regular price. Otherwise WooCommerce will not mark the product “for sale”):
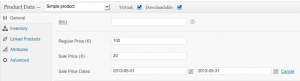
Schedule the sales price - Then choose the period where the sales price should be active
- Save your product settings
4. Activate the countdown on a product
- Log-in to your WordPress administration panel
- Go to “Products” and edit one of your WooCommerce products:
Choose “Products” from your WordPress administration panel - Scroll down till the “Product Countdown Settings” appear:
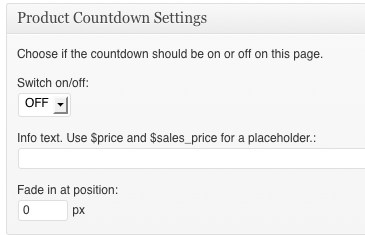
Product Countdown page settings - Set it to “ON” to activate the countdown.
- Set the info-text that is displayed together with the countdown. The standard-text is “Hurry up! The price rises in”
- Optional: You can use the following placeholders:
- $sales_price: To display the sales price in the info text
- $price: To display the normal price in the info text
- For example, you can write: “Hurry up! The price rises to $price in:”. The variable $price will then be replaced with the normal price.
- Optional: Choose “Fade-in” position. You can set a position when the countdown should appear on a page. Please read section #6 on this page to learn more about this.
- Save your settings.
- View your product page and see whether the countdown appears and how it looks like. Please note that it only appears when it’s in the period you’ve chosen on your product page (see section #3).
5. Activate the countdown on a page for a product
Of course sometimes it necessary to promote a product not only on the product page but on a landingpage as well.
- At first, follow the steps on section #3 (Prepare a WooCommerce product).
- Then go a page, a post or a custom post type you promote your product, too. In this example we edit a normal WordPress page.
- Scroll down till the “Product Countdown Settings” appear:
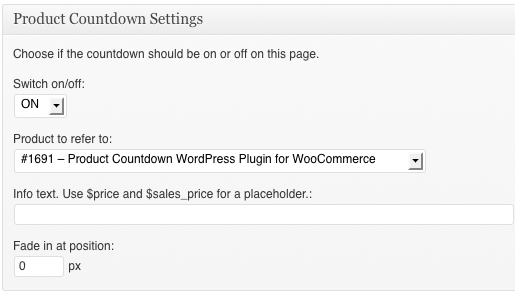
Product Countdown Settings on a page - Set it to “ON” to activate the countdown.
- Select a product from the dropdown menu.
- Set the info-text that is displayed together with the countdown. The standard-text is “Hurry up! The price rises in”
- Optional: You can use the following placeholders:
- $sales_price: To display the sales price in the info text
- $price: To display the normal price in the info text
- For example, you can write: “Hurry up! The price rises to $price in:”. The variable $price will then be replaced with the normal price.
- Optional: Choose “Fade-in” position. You can set a position when the countdown should appear on a page. Please read section #6 on this page to learn more about this.
- Save your settings.
- View your product page and see whether the countdown appears and how it looks like. Please note that it only appears when it’s in the period you’ve chosen on your product page (see section #3).
6. Make the countdown fade-in on a specific position
If you want the countdown to be disabled on page load to fade it in on a specific scrolling-position then do the following:
- Follow section #2 (Configure the plugin) on this page.
- Set up your product by following section #3 (Prepare a WooCommerce product) on this page.
- Then follow section #4 (Activate the countdown on a product) OR follow section #45 (Activate the countdown on a page for a product).
- If you followed section #4 view your product on the frontend.
- If you followed section #5 please view your page on the frontend.
- A little helper should appear on the top left. It looks like this:

- Scroll down to the position where you want the countdown to appear later.
- Copy the number that the helper shows to you (in this case this is “802).
- Then edit the current page again and scroll down to the “Product Countdown Settings”.
- Paste the just copied number into the “Fade-in at position”-field:
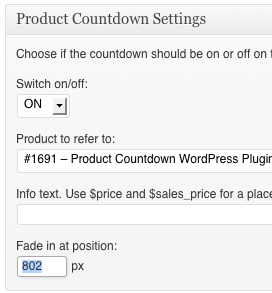
Copy and Paste the number from the helper - Save your settings and view your page again.
- Now the countdown should only appear at position 802.
- Note: The helper is only displayed on pages where the countdown is set to ON. And it’s only displayed for administrators that can manage WooCommerce settings.